
- Pentalobe screwdriver
- Phillips screwdriver
- Metal spatula
- Plastic spatula
- Suction cup
Preface
Use the following picture guide to easily change the display on your iPhone & and iPhone & Plus. Make sure that you install the home button from your old display into the new one. Without your original home button, the fingerprint sensor with touch ID will not work.
You should make a backup of your iPhone before changing the display and then turn it off.
Step 1: Remove Pentalobe screws

Remove the two Pentalobe screws on the bottom of the iPhone.
Step 2: Open display

Lift the screen out of the frame using either the suction cup or the thin metal spatula Which of the two you will use depends largely on the state of your screen. If it’s still mostly uncracked, the suction cup will work just fine.
Step 3: Detach display from frame

Drive the plectrum between frame and screen. Be careful not to insert it too far into the device in the area around the home button. Slowly lift up the screen, together with the inner metal frame it is attached to inside the device.
Step 4: Remove cover

Open the screen just enough so you are able to reach these five screws securing the metal cover.
Step 5: Detach connectors

Hidden underneath are four connectors which link the screen to the logic board. Remove them carefully using the plastic spatula.
Step 6: Remove earpiece speaker
* If you bought the item with Spare Parts(Front Camera, Sensor Flex, Shield plate, Earpiece Speaker), no need to do this step.


Holding the front-facing camera out of the way, remove the earpiece speaker from the front panel.
Try not to touch any of the contacts on the speaker or the cable—skin oils can damage them and interrupt the connection. If you touch them by mistake, clean them with a little isopropyl alcohol and give them a few moments to air dry.
Step 7: Remove front-facing camera and sensor cable
* If you bought the item with Spare Parts(Front Camera, Sensor Flex, Shield plate, Earpiece Speaker), no need to do this step.


Step 8: Remove Home Button
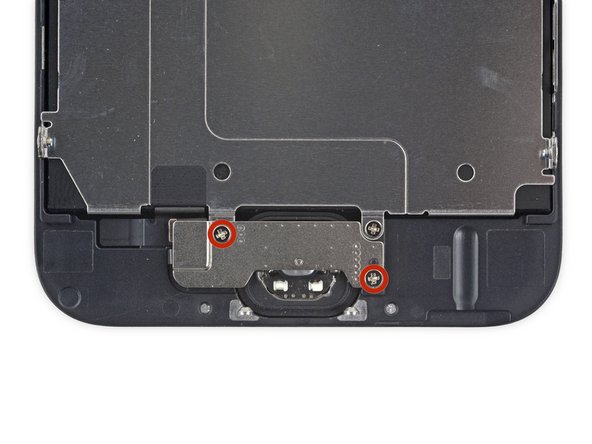

Use the point of a spudger to disconnect the home button cable connector by pushing it up and away from the home button.

The rubber membrane surrounding the home button is very thin and tears easily.
Apply mild heat (with an heat gun, or hair dryer) to soften the adhesive securing the home button membrane.
Using your fingertip, apply firm, constant pressure on the home button from the front side of the display assembly, until the membrane starts to separate from the front panel.
Do not push the home button all the way through—you only need to get a corner free so that you can pry it free with a spudger.
Step 9: Remove the LCD shield plate
* If you bought the item with Spare Parts(Front Camera, Sensor Flex, Shield plate, Earpiece Speaker), no need to do this step.

Remove the Phillips #00 screws securing the LCD shield plate to the front panel

Lift the front-facing camera end of the LCD shield plate up slightly.
Do not attempt to remove the shield plate entirely, it is still attached to the front panel by the adhered-down home button cable.

Slide the point of a spudger behind the shield plate to gently peel the home button cable up off of the front panel.
Be extremely cautious as you peel the home button cable. It is a fragile cable. If you feel more than slight resistance, stop and apply some heat from a hair dryer or iOpener to soften the adhesive, and then try again.
Remove the LCD shield plate.